
GOTW | Exporting Bank Transactions
"Tips & Tricks on exporting bank transactions from online banking ready to be imported into accounting software "
Commonly when you start using a new accounting software or transfer to a new accounting software, you will be setting up automatic bank feeds. The likes of Xero and MYOB Essentials have the great feature where your bank transactions import into the system automatically on a daily basis. This is a great time saving feature and allows for real time information and reporting.
During the process of setting up your bank feeds, more often than not there will be transactions that are missing. For example, your bank feeds may be live from the 15th January but you require the transactions from your bank account from the 1st January or even earlier.
This is when you will be asked to provide your accountant with either a .csv file or a. qif file exported from your online banking which contains the required bank transactions. These will be imported into your accounting software. Are you asking yourself, what are these file types? Or, how am I supposed to know how to get these? Below are some helpful tips and tricks about exporting these files.
Different file types:
1. OFX (Open File Exchange)
- This file format is used for financial data that contains transactions, statements and other financial information and is a very common format used by banks. Xero accepts bank transaction imports using this file type
2. CSV (Comma separated values)
- This is a file which saves data in a table structed format. It looks very similar to an Excel spreadsheet which you may be familiar with. Xero accepts bank transaction imports using this file type
3. QIF (Quicken Interchange Format)
- Just as it suggests in the name, this file format evolved from Quicken which is another accounting software program. It is now used by a variety of financial and accounting applications. It again is similar to the other file types in that when opened it is in a spreadsheet type format. This is currently the only file type that MYOB Essentials allows for import. Xero also accepts this file type as well
These three files formats can usually be opened in any spreadsheet program such as Microsoft Excel, Open Office Calc, Apple Numbers or Google Spreadsheets. This is helpful if after exporting transactions from your bank account, you want to open and review the data that it contains before your accountant imports into your accounting software.
So how do you export your bank transactions into these file formats?
Below is a step by step guide on how to export your bank transactions depending on which bank you are with.
Cick on your bank account below to get started:
ANZ Bank New Zealand Limited
Westpac New Zealand
Kiwibank
ASB Bank
BNZ
1. Log into ANZ Online Banking
a. Personal https://www.anz.co.nz/personal/
b. Business https://www.anz.co.nz/business/
2. Navigate to the account you would like to export transactions from
3. Click Export
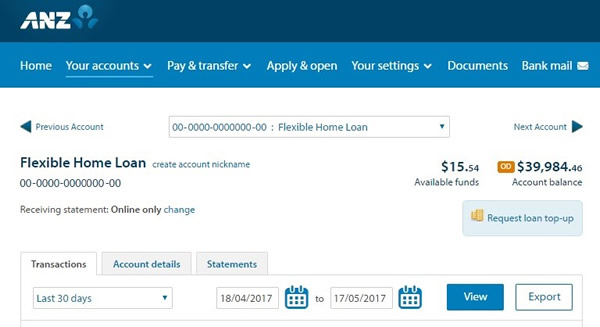
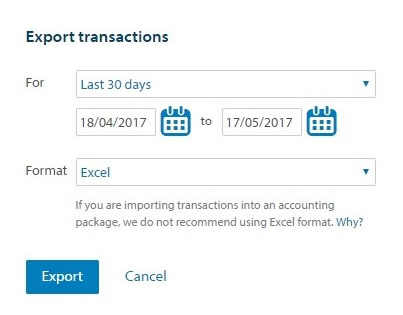
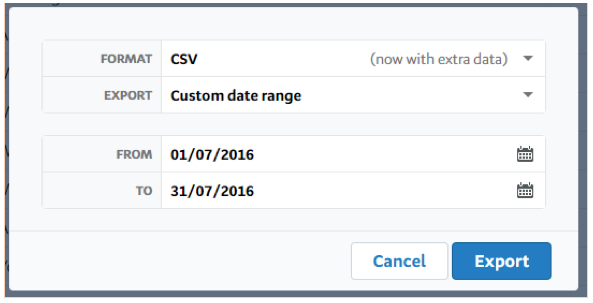
4. Select the date range required
5. Select the Format you would like to export as using the drop-down arrow i.e. CSV, QIF or OFX
6. Click Export
7. Save the file
8. Attach the file in an email to your accountant

1. Log into Westpac Online Banking https://www.westpac.co.nz/branch-mobile-online/online-banking
2. Navigate to the account you would like to export transactions from
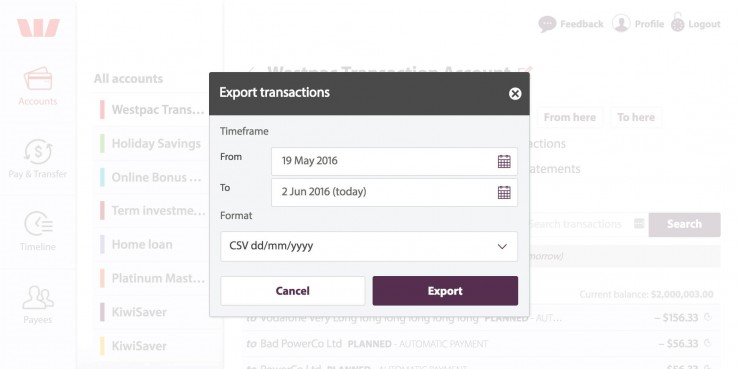
3. Select Export Transactions

4. Select the date range required
5. Select the Format you would like to export as using the drop-down arrow i.e. CSV, QIF or OFX
6. Click Export
7. Save the file
8. Attach the file in an email to your accountant

1. Log into Kiwibank Online Banking https://www.ib.kiwibank.co.nz/login?ReturnUrl=%2f
2. Navigate to the account you would like to export transactions from
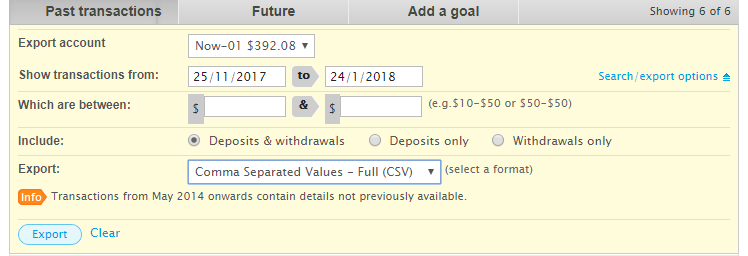
3. Select Search/export options to expand

4. Select the date range required
5. Select the Format you would like to export as using the drop-down arrow i.e. CSV, QIF or OFX
6. Click Export
7. Save the file
8. Attach the file in an email to your accountant

1. Log into ASB Online Banking https://www.asb.co.nz/
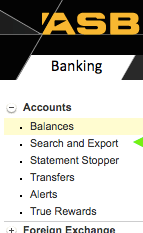
2. On the left-hand side select Search and Export
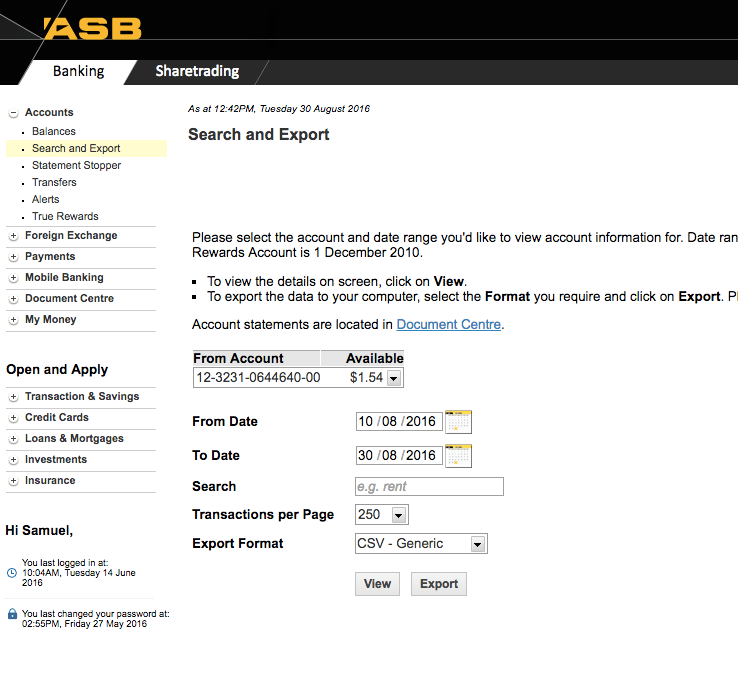
3. Select the account you would like to export transactions for
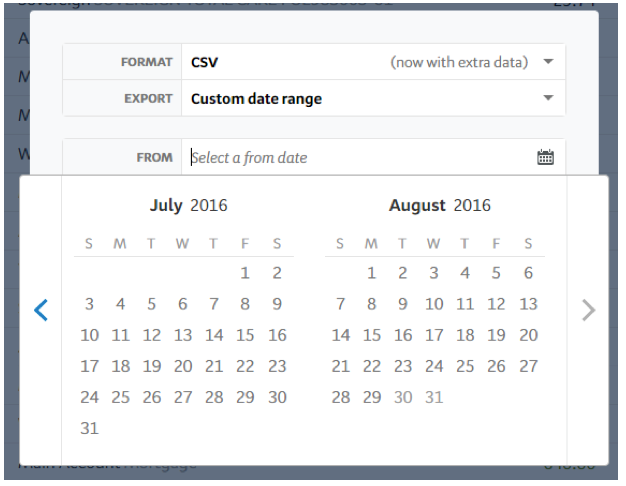
4. Select the date range
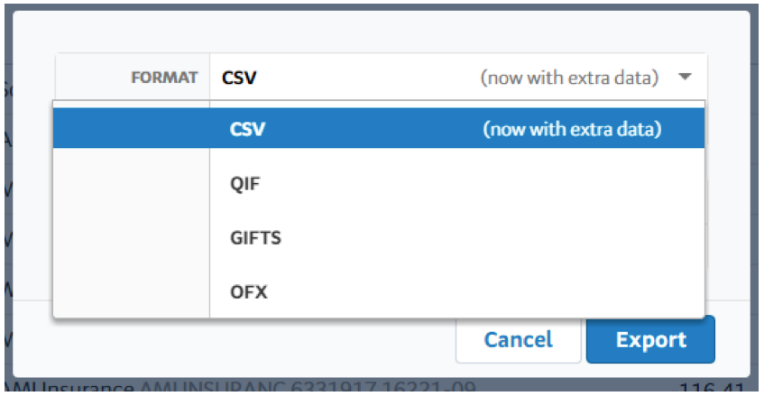
5. Use the dropdown menu to select Export Format i.e. CSV, QIF or OFX
6. Select Export
7. Save the file
8. Attach the file in an email to your accountant

1. Log into BNZ Online Banking
a. Personal https://www.bnz.co.nz/
b. Business https://www.bnz.co.nz/business-banking
2. Navigate to the account you would like to export transactions from
3. Select Export at the top right-hand side of the page
4. Select the Format you would like to export as using the drop-down arrow i.e. CSV, QIF or OFX
5. Select the date range
6. Select Export
7. Save the file
8. Attach the file in an email to your accountant
If you want to know more….
Please contact our in-house guru, Kate
http://www.bwr.co.nz/contact-us#itdept
06 873 8037
