GOTW | Xero Tip: GST Returns
"Tips on GST return setup and processing..."
Xero has a secure portal with the Inland Revenue Department. You can file your GST return directly from your Xero account, saving you time and minimising errors.
Find the GST Return area in Xero by following these steps:
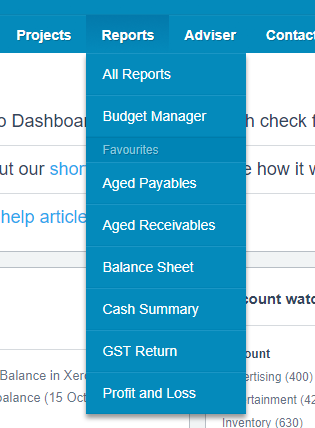
1. In the Reports menu, click All Reports
2. Under Tax, select GST Return
GEEK TIP 1: You can favourite the GST Return by highlighting the star next to the GST return for faster access.
Choose settings for your GST Return
The first time processing a GST return in Xero requires settings to be chosen. This only has to be done once or if your GST settings change.
1. The Enter your GST details window will appear
2. Xero automatically populates your GST Number, Frequency, and Accounting Basis based on the Financial Settings completed at the time of the initial Xero setup
3. Select a date range from the Next Period Due menu
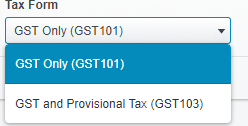
4. Select the Tax Form from the drop-down menu
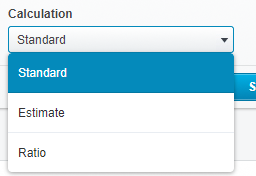
- a. If GST and Provisional Tax (GST103) is selected another field appears for Calculation
- b. There are three Calculation options to choose from
5. Once you are happy with the GST Settings, select Save
6. There will now be a list of GST returns showing based on the settings that you have entered
GEEK TIP 2: Please contact your accountant if you require help to choose the right GST settings.
GEEK TIP 3: If you enter a period from earlier in your financial year in the Next Period Due field, Xero displays all the GST Returns since that period.
Run your GST Return
Xero displays a list of returns that are due. For example, you may have several because they haven't been finalised in Xero, or because you've backdated some transactions.
GEEK TIP 4: Finalise your GST Returns in date order so Xero can correctly calculate any late claims. Once a GST return has been finalised, any changes that are made in Xero that affect a finalised GST return will automatically be included in the next GST returns as Late Claims. This will adjust the next GST return automatically.
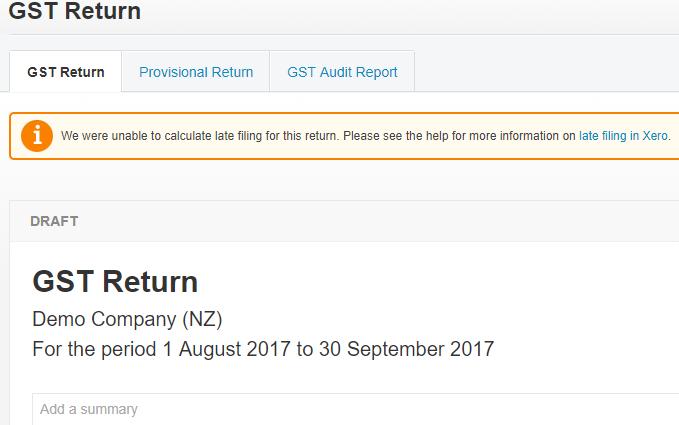
1. Select the GST Return you'd like to finalise. To preview a GST period not yet finished, click Preview period so far
2. Xero displays your GST Return in draft format. The GST Return tab shows a form similar to the IRD format that you are used to
View your GST Reconciliation and Late Claims reports
It is highly recommended that the GST Audit Report is reviewed before the GST return is filed. This is another way to review your coding and ensure the GST has been treated correctly on transactions. If there have been changes to previous GST returns periods that have finalised, this will create another tab that can be reviewed, Late GST Claims report.
GEEK TIP 5: When reviewing the GST Audit Report and the Late Claims Report tabs, if you notice errors, the transaction can be re-opened by click on the transaction (CTRL + click to open in new window) and can be edited to update the GST return.
GEEK TIP 6: When reviewing the GST Audit Report and the Late Claims Report tabs, you can sort transactions in each column by clicking on the column heading i.e. Sort by Date, sort by Account code or Gross amount.
Save your GST Return
Once you are happy with the GST return and you are ready to file with the IRD, save the GST return as Final, as mentioned before this locks down the GST period so any changes can be added to the next GST period as a late claim.
Re-finalise a GST Return for the last finalised period
Xero lets you re-finalise your GST Return for the last finalised period. You may need to do this if you find additional transactions to process, or make any changes to transactions in the return.
1. On the Reports menu, click All Reports
2. Under Tax select GST Return
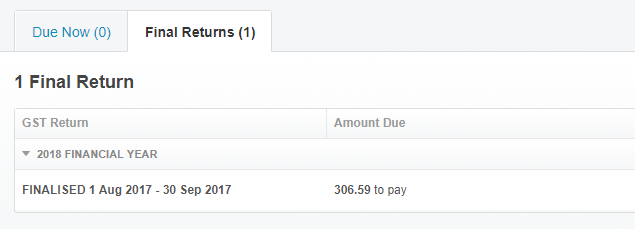
3.Click the Final Returns tab
4. Click your finalised GST Return to display it
5. Select Revert to Draft. You can only revert to draft on the most recently finalised GST Return
6. Re-finalise your GST Return by selecting Save Final from the Save menu
Publish your GST Return in Xero
If you have the Adviser user role or Standard user role (with reports), and you've saved your GST Return as a final, you can publish it. A published report provides a snapshot of your data at the time it's published.
- On the Reports menu, click All Reports
- Under Tax select GST Return
- Click the Final Returns tab
- Click on the GST Report you'd like to publish
- Click Publish
Submit your GST Return to Inland Revenue
Before you start
- You must have the Adviser, Standard + All Reports or Cashbook Client user role
- You must be authorised to file a GST return on behalf of your organisation using your myIR account login from Inland Revenue
- You'll need your myIR account login from Inland Revenue for your organisation
File your GST return online
1. Once you have saved your GST returns has final it will allow you to send it straight to IRD
2. Click File Now with IRD
3. Xero will take you to the Inland Revenue login portal. Enter your myIR login and password
4. When Inland Revenue accepts your login, Xero uploads your GST return data to Inland Revenue
5. In Xero, click the link to view the return receipt
6. If you have GST or provisional income tax to pay, make the payment separately.
Print and export a GST report
Xero lets you export your report to Excel, PDF or Google Sheets formats.
Your export will include the GST Return and Provisional Tax Return. It will also include the GST Audit Report and Late Claims report, if applicable.
Select from the Export menu to export your report to PDF, Google Sheets and Excel.
If you need any assistance with the GST Return process in Xero or have any further questions….
Please contact our in-house guru, Kate
http://www.bwr.co.nz/contact-us#itdept
06 873 8037

