GOTW | MYOB Capture App
"This is what we've been waiting for. MYOB has released an app for all MYOB Essentials users where you can take a photo of your receipt’s when you’re out and about. "
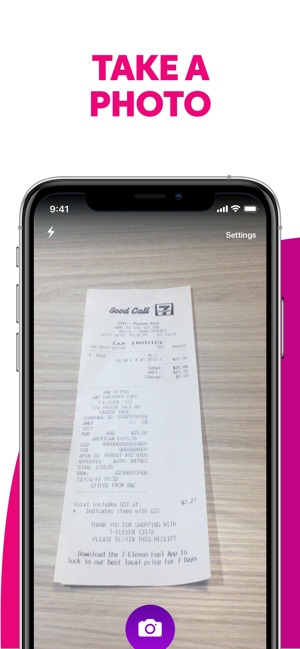
This is what we’ve been waiting for. MYOB has released an app for all MYOB Essentials users where you can take a photo of your receipt’s when you’re out and about. It’s as simple as taking a photo after you have finished your purchase and the app will take care of the rest by sending it to your In Tray in a matter of seconds – throw that receipt away.
If you have a compatible Android or iOS device, you’re ready to go—all you need to do is download and install MYOB Capture for Essentials:
Once it's installed, here’s how it works:
- Take a photo of your receipt.

- Drag the purple rectangle around the edges of your receipt.

- Check that you're happy with the image of your receipt.
- Send your receipt to your In tray!

5. Your receipt will be sent to your In tray, ready for you to use in MYOB Essentials.
What happens next?
Once the receipt is in your In tray you can:
- Create a new bill
- If you haven't entered the bill in MYOB Essentials, you can create it from the supplier invoice.
- Click the document in your In tray, then click Create new bill. MYOB Essentials will use optical character recognition (OCR) to read and automatically fill in as many of the fields on the bill as possible. All you need to do is check the details that have been automatically entered (highlighted in blue), and enter any additional details that are needed.
- Auto-coding your bill
- If you frequently upload bills from the same supplier and allocate their items to the same account, select a default allocation account from the Account code dropdown.

- The next time you create a bill for this supplier, the default account will populate the Allocate to field in the In tray.
- If you want to take a closer look at the original document while you're entering its details, click the icons next to the document preview to download the original document, show it in a new window, split the view between the document and the bill you're creating, or enlarge it.
- When you're done, just click Save.
- Link to an existing bill
- If you've already entered a bill in MYOB Essentials that correlates to a supplier invoice in your In tray, you can link the document to your bill. Just select the document in your In tray, click Link to existing bill and choose the bill from the list.
- If there's a bill that looks like it matches, MYOB Essentials will highlight it for you. Just choose the right bill from the list and click Link to selected bill.
- The document is linked to the bill, and disappears from your In tray.
- Link to a bank transaction
- From the Banking menu, choose Bank transactions.
- Click the dropdown arrow for the transaction you want to attach a document to.
- Click Attachments.

- Click Link from In tray.
- Choose the document you want to attach and click Link. The document is attached to the transaction.
- Once you’ve linked a document, it will disappear from the In tray. If you unlink it, we’ll send it straight back.
- Create a Spend money transaction
If the document you've uploaded to the In tray isn't a bill (maybe it's a receipt for an incidental purchase), you can use it to create a new Spend Money transaction.
- Select the document in your In tray and click Create new Spend Money

- Fill in the details of the transaction.

Click Save. The Spend Money transaction is saved with the document attached to it.

Want to know more?...
Please contact our in-house tech hub experts.
http://www.bwr.co.nz/contact-us#itdept
06 873 8037

